
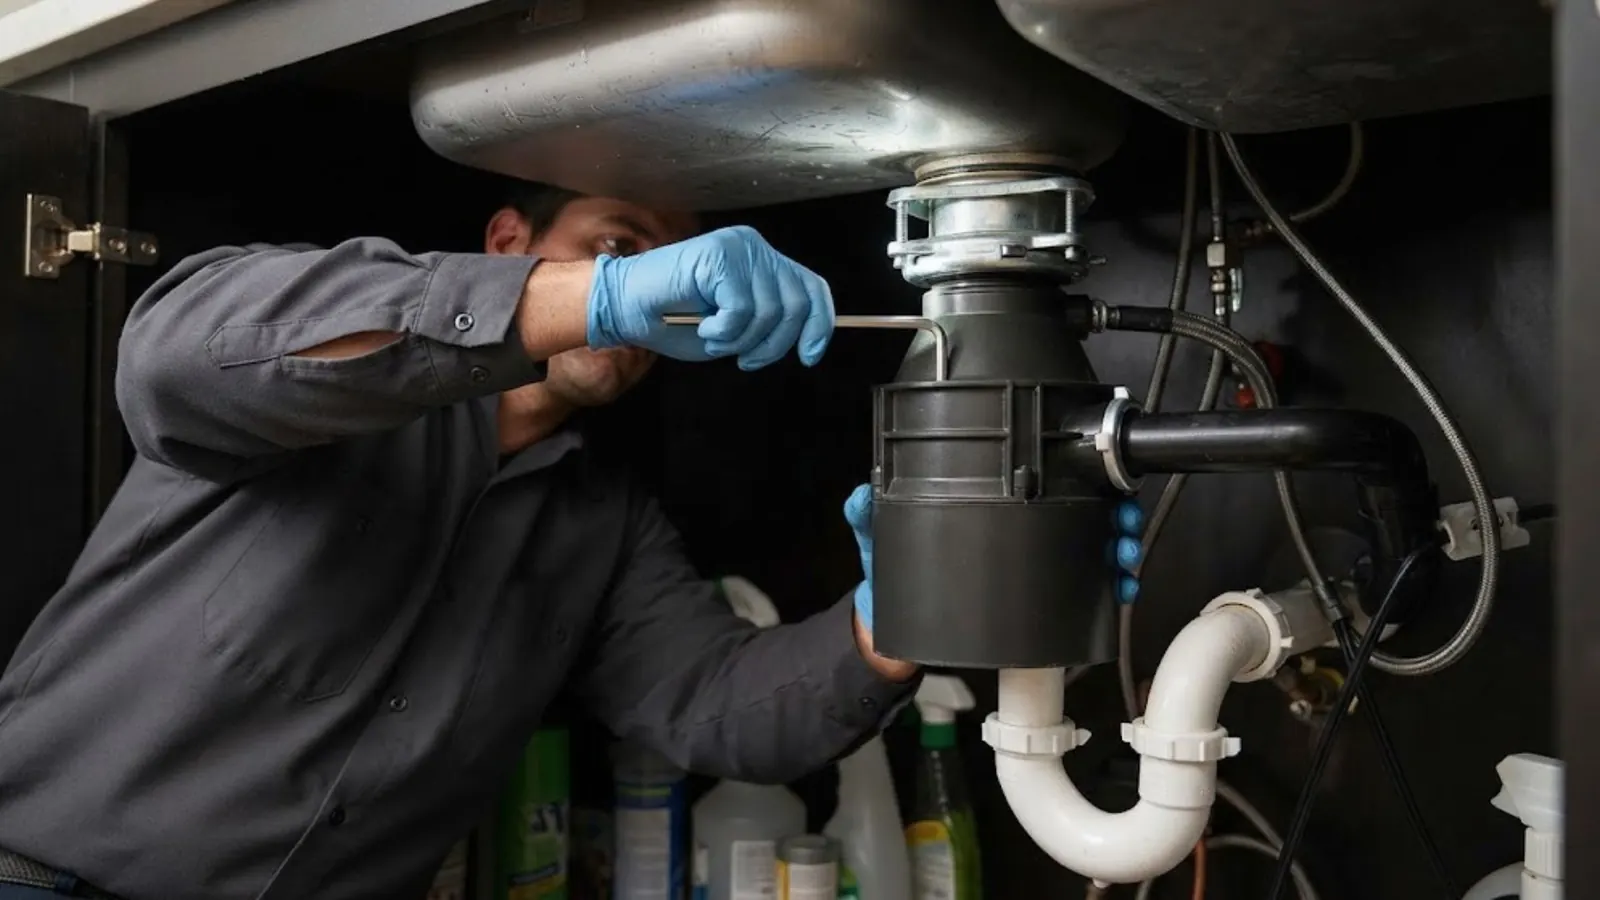
To install a garbage disposal, switch off the breaker, remove the old mount, and seat the new flange with plumber's putty. Snap the mounting ring on from below, hang the unit, connect the drain, and run water to test for leaks. Swapping one unit for another usually takes two to three hours.
This guide walks through the real sequence a Casselberry homeowner would follow, including the two steps most people miss: knocking out the dishwasher plug and checking for power before touching a wire. It also says plainly where a do-it-yourself job stops being a good idea. If your unit is already failing, our garbage disposal repair service may fix it without a swap.
What to gather before you start
Most failed installs come from a missing part found halfway through, with the sink already torn apart. Lay everything out first and confirm the new disposal fits your sink opening. Standard kitchen sinks use a 3.5 inch drain opening.
- A disposal sized for your household, commonly one-third, one-half, or three-quarter horsepower.
- A disposal power cord kit or a length of three-wire cable with a strain-relief connector, if your model ships without a cord.
- Plumber's putty, a flat screwdriver, a hammer, and channel-lock pliers.
- A non-contact voltage tester, which costs little and is the one tool you should not skip.
- A new dishwasher drain hose clamp and a short length of drain tubing if the old one is cracked.
- A bucket, rags, and a flashlight for the dark cabinet.
Step by step: removing the old unit and mounting the new one
Work in this order. Each step sets up the next, and skipping ahead is how flanges end up leaking.
- Turn off the disposal switch, then shut off its breaker at the panel, and confirm with the voltage tester that the wires are dead.
- Place the bucket under the trap, loosen the slip nuts on the discharge tube and the trap, and let the water drain out.
- Support the old unit with one hand, twist the mounting ring lugs with a screwdriver, and lower the unit onto the cabinet floor.
- Push out the old sink flange from above, scrape off dried putty, and wipe the sink opening clean and dry.
- Roll a rope of plumber's putty about as thick as a pencil, press it around the underside rim of the new flange, and seat it in the sink opening.
- From below, slide on the fiber gasket, backup ring, and mounting ring, then tighten the three mounting screws evenly until putty squeezes out.
- Wipe away the squeezed putty from the sink side, which leaves a clean seal and makes later leaks easy to spot.
The dishwasher knockout plug nobody tells you about
New disposals ship with a solid plastic plug inside the dishwasher inlet nipple. If your dishwasher drains into the disposal, you must knock that plug out before connecting the hose, or the dishwasher will never drain.
Set a screwdriver against the plug from the inside of the nipple and tap it with a hammer until it drops. Fish the loose plug out of the grinding chamber with your fingers or tongs, with the power still off. Skip this step only if your dishwasher drains to a separate air gap or a different tailpiece.
Wiring: plug-in or hardwired
Disposals connect two ways. Many kitchens have a switched outlet under the sink, and a cord kit plugs straight in. Others are hardwired through the bottom plate.
- Remove the cover plate on the bottom of the disposal and look for the black, white, and green wires.
- For a cord, feed it through the strain-relief connector, join black to black, white to white, and green to the green ground screw, then close the plate.
- For a hardwired job, do the same inside the plate, and tighten the connector so the cable cannot pull out.
- Hang the disposal from the mounting ring by lifting it onto the lugs and twisting until it locks.
- Reconnect the discharge tube with its gasket, then reattach the trap and tighten the slip nuts by hand plus a quarter turn.
Plug-in cord or hardwired: which suits your sink
| Factor | Plug-in cord | Hardwired |
|---|---|---|
| Needs an outlet under the sink | Yes, switched or on a wall switch | No, wires run to a junction box |
| Swap time later | Fast, just unplug | Slower, wires must be disconnected |
| Typical skill level | Basic DIY | Comfortable with household wiring |
| Best when | An outlet already exists | Original install had no outlet |
| Call a licensed pro if | The outlet is old or ungrounded | You cannot trace which switch controls it |
The leak test that catches problems before the cabinet closes
Do this with the cabinet doors open and a dry paper towel in hand. A slow weep shows up on paper long before it shows on a cabinet floor.
- Fill the sink with a few inches of water, then pull the stopper and watch the flange from underneath.
- Run the cold tap and dab every joint, including the mounting ring, discharge tube, and trap, with the paper towel.
- Turn the breaker back on, run cold water, and flip the switch for ten seconds.
- Listen for rattling, which usually means a leftover plastic plug or a loose mounting screw.
- Run the dishwasher drain cycle and check the hose connection at the disposal inlet.
When a garbage disposal install is a job for a licensed plumber
Some jobs are not worth the risk. If the sink has no existing electrical supply under it, adding a circuit is electrical work, and a licensed electrician should do it. If the drain lines are corroded, they may crack as you loosen them.
Call a plumber if the trap arm is out of alignment, if the sink is stone or composite and the flange hole is the wrong size, or if the drain backs up even before the new unit is installed. Our plumbing installation team handles disposals alongside other fixtures, and a slow kitchen drain that persists is a job for a drain machine. We reach Longwood and Oviedo homes from our Semoran Boulevard office as well as Casselberry ones.
What changes the cost of a garbage disposal installation
There is no single price, because the work behind two identical-looking sinks can be very different. These are the factors that move a quote up or down.
Unit size and grind quality
A larger motor with more insulation costs more than a basic one-third horsepower unit, and a continuous-feed model differs from a batch-feed model.
Wiring status
A sink with a working switched outlet is simple. Adding a switch, outlet, or cable run adds labor and may need a licensed electrician.
Condition of the trap and drain
Old, brittle tailpieces and traps often need replacement once disturbed.
Dishwasher connection
Adding or correcting an air gap or high loop changes the parts list.
Removing the old unit
A stuck or corroded mounting ring can turn a short job into a long one.
Homeowners insurance usually covers sudden and accidental damage, but typically not the failed part itself or gradual leaks and wear. Check your policy if a leak has already damaged the cabinet.
Replace it or repair it: a quick decision guide
| Symptom | Likely cause | First move |
|---|---|---|
| Humming, no grinding | Jammed flywheel | Turn it off, use the hex key in the bottom socket, then press the reset button |
| Leaking from the bottom | Cracked housing or failed seal | Replace the unit |
| Leaking at the top flange | Putty or mounting ring loose | Tighten or reseat the flange |
| Repeated clogs | Drain line issue beyond the unit | Have the line cleared before replacing |
| Unit is more than a decade old and noisy | Worn bearings and grinding wheel | Replace on your schedule |
Casselberry notes: permits and picking the right installer
Permit rules vary, so ask the Casselberry Building Division at 95 Triplet Lake Drive before you start any work that involves a new circuit or moved plumbing. The division is open Monday through Thursday, 7 a.m. to 6 p.m., and has an online permit portal, so the question can often be settled without a trip.
If you hire out, check the license first. Florida contractors are licensed by the Construction Industry Licensing Board under Chapter 489, Florida Statutes, and you can verify any license at MyFloridaLicense.com using Verify a License. Search both the business name and the individual qualifier. The city also asks contractors to upload a state license, workers' compensation proof or exemption, general liability insurance, and a business tax receipt with permit applications.
Sources and standards used: City of Casselberry Building Division page and online permit portal information, Florida DBPR MyFloridaLicense.com licensing guidance
Frequently asked questions
A straight swap of one unit for another typically takes two to three hours for a careful first-timer. A new install with added wiring or a moved drain can take half a day or more.
Not always. If there is already a working disposal and an outlet or hardwire connection, a handy homeowner can do it. A new circuit, a damaged drain, or a stone sink opening makes professional help worth it.
The knockout plug in the dishwasher inlet is the usual cause. Turn the breaker off, reach into the inlet from the grinding chamber side, and knock the plug out. Also check that the hose has a high loop or air gap.
The flange at the top is the likelier culprit, because plumber's putty that was too thin or dried out will weep when the unit vibrates. Reseat it with a fresh rope of putty and retighten the three mounting screws evenly.
Permit rules vary, so ask the Casselberry Building Division at 95 Triplet Lake Drive. It is open Monday through Thursday, 7 a.m. to 6 p.m., and has an online portal. A like-for-like swap on an existing hookup is a different question from adding a circuit, so describe the job exactly when you ask.
Still not sure which answer fits? Describe it to a licensed plumber.
Call (407) 964-8940Plumbing help for this problem
Related services:
Nearby towns we serve: